Showing posts with label tutorials. Show all posts

Monday, May 11, 2020

12 Ways Of Protecting your Android/Tablet Devices From Malware Infection


Since the introduction of modern computers, malicious software or malware has been an omnipresent issue. Viruses, Trojans, rootkits, spyware, keyloggers and several others of the like continue to assault your computing devices all the time, looking for vulnerabilities and loopholes in your defenses to get through. Generally, users have become aware enough to deploy some form of protection on their desktops and notebooks, and while infections continue to plague the computing world, they’re significantly reduced in impact. Smartphones today are nothing short of portable computers as well, and just like that, are prone to malware attacks. Hard as it may seem to believe, developers do spend time creating Smartphone malware that would let them access your personal information, exploit personal data and otherwise do damage to your device. Android Device is a fast-growing mobile platform with apps exceeding 600,000 in the Google Play Store, and believe me when I tell you that an assessment puts over 100,000 of them as “questionable”. While most users don’t pay much attention to it, it’s imperative that you secure your Android smartphone or tablet against the growing threat of mobile malware. They say prevention is better than cure, and in this post, we’ll provide some basic pointers on how to achieve that.

Ways to Keep your Android/Tablet Device Secure
There are easy ways to reduce the risk of infection in your Android. Most of these ways are simply common sense. Developers and specific cell phone manufacturers do encourage their customers to use the proper download applications and widgets.

1. Download Only From Official Stores
When downloading apps, prefer the well-reputed channels, mainly Google Play Store and the Amazon App Store. Google implements a rudimentary “bouncer” to ward off malware, and the rest is taken care of by the very active Android user community. Hence, these two sources are your most reliable ones.


2. Keep Installation of Apps from Unknown Sources at “Off”

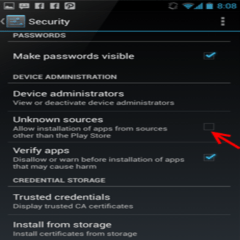
Unless you’re a power user, it’s highly advisable to keepthe installation of apps from Unknown Sources at “off” in the device’s settings. This will help ensure that nothing enters the system except through official channels.


3. Rooted Devices are More Susceptible

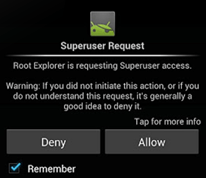
Most advanced users choose to root their Android devices, be extra cautious about granting Superuser access to any app. Make sure you understand the purpose of the SU access and trust the developer enough to grant it. This is the highest level of access that anyone (or anything) can have on your Android device, so be really careful with this one.


4. Install an Antivirus/Security App on Your Android Smartphone

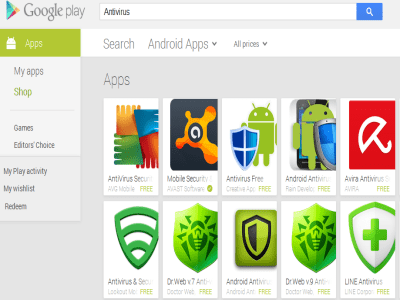
A lot of capable contenders are available in the Google Play Store for that purpose, with more notable ones being Avast! Free Mobile Security, Lookout Mobile Security, AVG Mobile Security, Kaspersky, and Norton Mobile Security, just to name a few. There is a different feature-set offered by each, so you have room to weigh your options carefully before making a decision to go with one.


5. It is Important to Read App reviews and See ratings before downloading

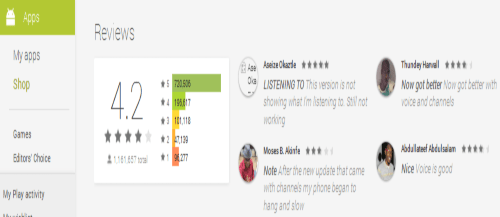
Read app reviews and see ratings before you choose to download anything. If it’s something from a renowned developer, you’re less likely to run into trouble as opposed to an app with hardly any downloads and just 2-3 reviews. As a rule of thumb, I don’t prefer apps with a rating of less than at least 3 stars.


6. Examine the Permissions that an App is Asking For, During Installation

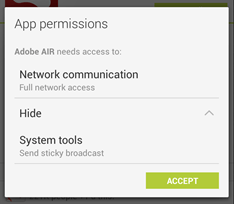
Carefully examine the permissions that an app is asking for, and use your own judgment to decide whether you want that app or not. E.g A puzzle game asking to access your contacts and the phone app is never really a good idea, and neither is a torch app seeking internet permission. Discard apps that seem shady – they’re usually not worth risking personal information over.


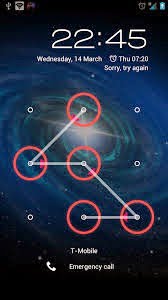
7. Keep Your Phone Locked Always

While not strictly a malware protection measure, it’s still a good idea to keep your phone locked for security. Someone else gaining access to your device might be able to install undesired software before you reclaim access, and hence, causing you to remain unaware of the whole deal until it’s too late. Likewise, a remote wipe app should also be there, should you ever encounter a scenario where normal access to the device gets blocked by the malware infection.


8. Never access links embedded in mass-broadcast messages/emails on your phone.

You never know what’s hidden underneath a URL, and it’s harder to check that on a Smartphone as opposed to a traditional computer. Phishing scams thrive under unrestricted access through your web browser.

9. Beware of Fake Apps Even on Play Store

On the Play Store, there are loads of fake apps designed with the intention of infecting your device and stealing your private information. Some apps are designed only to push ads to your Smartphone. As a matter of fact, most popular apps often have similar ones that are actually fake. You should be careful with these sorts of apps.

10. Avoid Pirated Apps

If you love the cracks and pirated apps, your device may become infected without you even knowing it. Pirated apps most often carry Malware strands. Besides, you’re not helping the developers who work hard trying to create these games and apps. Saving $0.99 isn’t worth it, really.

11. Porn is the Most Efficient Source of Malware Delivery

I’m in no position to judge you or tell you what to do with your device, but it has been proven that pornographic sites are the most efficient when it comes to infecting your device with malware. Well, you know what to do… be careful with sites you visit.

12. Stay Updated

Be on your toes so far as updates are concerned. This is one way in which manufacturers and carriers ensure that you remain protected from Malware attacks. These updates can include enhancements, bug fixes, new features each of which are designed to keep your system in tune with the right way to tackle the malicious attacks. Apart from updating your apps, be sure your device operating system is also up-to-date. Conclusion Following the above steps will help you ensure that your device remains secure, safe from malware, and most importantly, exclusively yours. Do you have a tip that we should’ve included here and missed? Drop us a comment below.

Saturday, June 16, 2018

Solve Battery Drain Problem In Android and extend battery life

           Our smartphones are getting more and more capable by the day. We use them for listen to music, watch videos and movies, browse social media, surf the web, play games, read and reply to personal and work emails, and now, with VR becoming a larger focus, you can even enjoy a completely different world and experience while sitting in the comfort of your own home. Of course, on the rare occasion that it is required, you can even make a phone call.

   One aspect of the smartphone that unfortunately hasn’t kept up is battery, and the only real solution is to either get a device with a huge battery, or take advantage of phones with fast charging capabilities, so at least you aren’t wasting a lot of time charging it. There are a few things you can do to get the most out of your phone however. Admittedly, these tips and tricks aren’t going to double or triple your battery life, but at the very least, you won’t end up with a switched off device when you need it the most. Let’s take a look!

Apps that drain your battery

best battery saving apps for android
          Being able to have numerous apps for different purposes downloaded on your phone is what makes our  smartphones so good. However, there may be a few that are resulting in rapid Android OS battery drain., without you even knowing about it.
You can see which apps are using up your battery by going to the Battery section in the Settings menu. Of course, if you have been using an app often, it will be higher up on the list. That said, if you find that an app is causing an abnormal amount of battery drain, your best bet is to uninstall that particular app. These issues can often be fixed with a software update, so once an update for that app rolls out, you should be able to install it once again.
There are also some apps that access your location, and using GPS in the background can cause significant battery drain. You can see if this is the cause by going to the Location section in the Settings. Here, you will see a list of apps that use location services, and tapping on an app will show how much battery has been drained because of it.
If it is significant, you can stop it by turning of the location option in the App Permissions for the particular one. Along those lines, it may also be a good idea to keep GPS turned off when you aren’t planning to use it. With most smartphones, you find the GPS toggle in the Quick Settings list in the notification dropdown. So, if you are planning to use Google Maps, you can turn GPS back on, and then turn it off again after you’re done.
Finally, another reason some users may see battery drain is because of widgets. As fun and convenient as widgets may be, having a lot of them can result in a lot of battery life being used up. So, if there are any widgets that you don’t use often and can do without, it may be a good idea to remove it.

Power Saving modes

Samsung Galaxy S7 Edge vs Nexus 6P battery usage
Every Android smartphone will come with some form of a power saving mode, and enabling them does things like remove animations, turn of background syncing, turn off location services, and reduce display brightness, to help get some extra juice out of your battery. These modes are usually activated automatically when the battery reaches the 15% mark, but if you generally running low and feel like you won’t be able to get to a charger for a while, you can manually enable it in the Settings menu.
When you are running really low, some smartphones, from OEMs  like Samsung, Huawei, and more, offer an Ultra Power Saving mode. This essentially turns your device into a feature phone, and all you can really do is make calls or send text messages. If you are really running low on battery and need to be able to contact someone, this mode will prove to be a life saver.

Display settings

One of the advantages to an AMOLED display is that you can optimize the colors better to save battery life.
Most smartphones nowadays come with an Auto Brightness setting, that, as the name suggests, automatically sets the brightness level of the display by detecting the lighting condition. If you are looking to extend your battery life, manually setting the brightness to a lower level makes quite a big difference in this regard. Unless you absolutely have to bump up the display brightness, keeping it low is a good idea.
You can also save a little bit of battery by changing the screen timeout interval, which is the amount of time the display stays on, while the device is idle. Unless you need the display to stay on when the device is idle for a long time, changing this interval to something like 10 seconds will help just a little bit. You can find this under the Display section in the Settings menu.

Battery maintenance

samsung galaxy note 7 vs nexus 6p quick look aa-8
While most smartphones offer great battery life at the start, you will find its performance fading after a year or two, or even sooner, if the battery isn’t maintained properly. Studies have found that batteries tend to degrade faster when the device heats up, regardless of whether it is in use or idle. Even simple things like not leaving your phone on the car dashboard on a hot, sunny day will help with Android OS battery drain.
When in use, and especially when playing graphic-intensive games, we’ll all found our devices becoming uncomfortably warm. At the time, it’s a good idea to close the app and let the device rest till it cools down, or even turn the phone off, to speed up the process.
Many users are proponents of the 10-90 system, which means that you don’t charge your battery beyond 90%, and never have it drop less than 10%. Some studies have shown that 40-80 is even better, but that isn’t always possible, especially when it comes to the lower end. However, it is recommended that you discharge the battery fully and charge it back to 100%, at least once every three months or so, to help prevent Android OS battery drain.

Apps that help with battery life

Greenify teaser
It may seem counterproductive to download more apps to prevent Android OS battery drain on your phone, but there are a few very useful ones out there.
Greenify helps you identify which apps are causing battery drain, and put these into hibernation when you are not using them, to stop them from lagging your device and leeching the battery. They can do nothing without an explicit launch by you or other apps, while still preserving full functionality when running in the foreground.
Keep in mind that most functionality of the app is disabled, so it’s not a good idea to use with alarm clocks or messaging apps. Greenify has also added “Agressive Doze” and “Doze on the go” features, for devices running Android 6.0 Marshmallow and above. You can download Greenify from the Google Play Store here.
Doze is a feature that is built in to Android 6.0 Marshmallow, that does a great job with preventing Android OS battery drain when the device is idle. However, Doze mode only kicks in when the device is unplugged, and stationary for more than 30 minutes. If you are looking for this feature, but without these conditions, there is an app for you, which makes activating it very easy. The best part is that this app is available for devices running Android 4.1 or higher, so you didn’t need to wait for an official upgrade to Marshmallow to enjoy this feature. You can download Doze here.

So, there you have it for this look at some general ways you can extend your battery life and prevent Android OS battery drain.

Friday, January 5, 2018

How to Unlock an ITEL Phone

Yes! Am back with my knowledge which is helping me and you my dear readers. This is another trick to unlock your ITEL Phone if you have forgotten the password or pattern. the following steps are to be followed if such happens to you
           To unlock the screen of your ITEL phone, wake the screen (by swiping or pressing the Power button) and then enter your password, code, or PIN. If you’re unable to unlock your phone, try signing in with your Google account (for Android 4.4 and below) or using Android Device Manager (5.1 and up). If neither of those methods work, performing a factory reset will help you regain access to your phone.
diasble pattern lock for android
unlock password lock on android
FIRST METHOD: Signing in with your Google Account
1. Attempt to unlock the phone 5 times. This method will only work if you’re using Android 4.4 KitKat or earlier (it1407, it1406, it701, it503, or it501) and you lock your phone with a pattern code. If you can’t unlock your phone with after 5 tries, you’ll see a button that says “Forgot Pattern.”
2.Tap “Forgot Pattern.” Now you’ll see a Google login screen.
3. Sign in with your Google username and password. Make sure you are using the username and password for the Google account that’s associated with this phone. An email will be sent to the Gmail account to confirm your identity.
4. Log in to Gmail from another device. You’ll have to use another device with internet access to unlock the phone.
5. Click the link in the message from Google. The email contains a link that you must click to confirm that you are who you say you are.
If you don’t remember your Google password, visit https://www.google.com/accounts/recovery in a web browser.6. Tap “Settings” in the app drawer. Now that you’re back into your phone, you can set a new unlock pattern.
7. Select “Lock Screen.” This option appears under the “Personalization” section of the Settings menu. This will bring you to the “Lock Screen” menu.
8. Select “Screen Security.” This is the first option under the “General” heading.
9. Tap “Screen Lock.” Now you’ll see a menu containing the different methods of locking your screen.

10. Select “Pattern.” Now you’ll see a list of different pattern sizes (e.g., 3x3, 4x4, 5x5). The option you select determines the amount of dots on which you’ll draw your pattern.

  • For example, if you pick 4x4, the unlock screen will show 4 columns of dots and 4 rows of dots.
11. Tap a size and draw your pattern. When the dots appear, drag your finger across the dots in your desired pattern. If you make a mistake, tap “Retry.”
12. Tap “Continue” and confirm your pattern. Now you’ll have to redraw the pattern, just to make sure it matches.
13. Tap “Confirm” to set the pattern. As long as the two patterns match, you’ll return to the Screen Security menu. The next time you unlock your phone, use the pattern you just created.


SECOND METHOD: Performing a Factory Reset
1. Try one of the other methods. If you’re unable to unlock your ITEL phone using one of the other methods, you’ll have to do a factory reset. This will erase everything on the phone except for what is saved to your SD card.
2. Press the power button and select “Power Off.” You’ll want to power the phone all the way down so you can boot into Android Recovery Mode.
3. Hold down the Power and Volume Down buttons at the same time. After several seconds, you can let go. You’ll see an Android icon appear on the screen and the words “No Command".
  • On some ITEL models, you may be brought directly to the Android System Recovery Mode menu without seeing an Android icon.
4. Press the Volume Up button. A black screen will appear containing the header “Android System Recovery Mode.”
5. Use the volume buttons to select “wipe data/factory reset.” The Volume Up button moves the selection bar upward, and the Volume Down button moves it down.
6. Press the Power button to select, then again to confirm. The phone will now go through the factory reset process, which will take several seconds.
7. Press the Power button when you see “Reboot System Now.” When the phone restarts, follow the prompts to set it up as though it’s a brand new phone.

THIRD METHOD: Using Android Device Manager
1. Visit https://www.google.com/android/devicemanager in a web browser. If you set up Android Device Manager when you first set up your ITEL phone, you should be able to unlock it using Android Device Manager. You’ll need to complete most of the steps at a computer that has internet access.
  • This method will only work on phones running Android 5.1 or above.
2. Sign in with your Google username and password. Make sure you’re signing in with the same Google account you used to set up your ITEL phone.
3. Click your ITEL phone. If you see your ITEL phone listed, click it to view its settings. You should now see the options “Ring,” “Lock,” and “Erase.”
  • If you don’t see it, this means you haven’t set up Android Device Manager for this phone. You’ll need to try another method.
4. Click “Lock.” A new screen will appear, prompting you to set a brand new password.
5. Set a temporary password. The password you set here is the one you’ll use to unlock your phone. Don’t worry about filling out the rest of the information on this page, just set a new password. You’ll be able to change once the phone is unlocked.
6. Unlock your ITEL phone. Your ITEL phone should now display a password blank. Type the temporary password you just set, and you’ll be back in to your phone.
7. Tap the Settings app. You’ll find this app either on the home screen or in the app drawer. This is where you’ll be able to set a new password for your phone.
8. Select “Security.” You may have to scroll down a bit to find this option.
  • If you don’t see “Security,” select “Screen Lock.”
9. Tap “Screen Lock.” You’ll be prompted to enter the current password before you can continue. That’s the password you set on the Android Device Manager website.
10. Choose the type of password to set. The options are different depending on the type of phone you have.
  • Select “Pattern” to draw a pattern across a series of dots to unlock your phone.
  • Select “PIN” to set a numerical code (4 digit or more) that you’ll be able to “dial” into the keypad to unlock your phone.
  • Select “Password” to type a password (can be letters and/or numbers) to type using the phone’s keyboard.
11. Follow the prompts to reset your password. The new password will take effect immediately. The next time you sign in to the phone, use the password you just set.
  1. Tap a size and draw your pattern. When the dots appear, drag your finger across the dots in your desired pattern. If you make a mistake, tap “Retry.”
I hope this above methods will be the best option for you to unlock your android phone.

PLEASE YOUR COMMENTS WILL BE HIGHLY APPRECIATED!
THANKS FOR READING!


Sunday, October 15, 2017

How to get the OS 10.2 update

BlackBerry is rolling out OS 10.2 to various countries and carriers starting this week. For those of you who are low on the list and are a bit eager to get your hands on the official version, you can do just that. 
Forums member LopezZ10 has dropped a quick how-to for getting the official version of OS 10.2 on loaded up on your device using Sachesi. Granted some of you may still want to hold out for an officially official version from your carrier for your device, but if you just can't wait to get it, check out this quick tutorial to start using OS 10.2 right now.
As always, make sure you know what you're getting into before you start any of this. Perform a full backup of your device first and don't hold us or anyone else responsible should anything go wrong. If you need help of have questions ask them BEFORE you try this.
To start, you'll need to download and install Sachesi. It's a good idea to remove your SIM and also perform a full backup of your device before you start as well.
1. Plug in your device to you computer using a microUSB cable.
2. Open Sachesi and search for the update using the parameters below. Make sure you use the correct Device and Variant depending on your device.
3. Select "Download All". Remember where you save the folder.
4. When the download is complete, go to the Install tab and select Install: .bar(s)
5. Select the folder with the OS that was downloaded earlier in step 3
6. Wait patiently for the OS to load on your device
It can take 30 minutes or longer to load the OS onto your device, so just hang tight and don't do anything until it's done.
When the process is finished you'll have a shiny new official version of OS 10.2 on your device - enjoy!

Saturday, October 14, 2017

Blackberry Z10 dead or red light blinking done (tested)


This solution awesome for blackberry Z10 when i try in first time in blackberry Z10 then device was dead so try to online update and it is success but in online update many time waiting for that so here simple solution which is first time wait many time when you downloading but after downloading you can easy flash without any risk just few minute only so this is most impotent for everyone one who working in mobile software related and here some impotent notes remember everyone before use this tutorial first of must be charged battery to device up to 80% per. and also working well micro usb cable, working well your computer or laptop usb socket these most impotent if any issue then you can't flashing device

This flash file tested by me without any error working well,  you can use this flash file when your device hang on logo problem, restarting problem, security lock problem, password lock problem, pattern lock problem etc software related problem and you can use this tutorial without any box and this is free for all who know about software in mobile, impotent for flashing first must check your micro usb cable if not good then you can't flash it so check micro usb cable second check your device battery that is impotent for flashing if your device battery low so stop your device between flash so this is impotent for flash, before you flash save your data like contact, photos, videos etc because this is factory flash file so you can't save after full flash so must remember all are impotent notes.

Download Link
Z10_10.3.02.2876_STL100-1 Download here

How to reload the OS on a BlackBerry Z10 or BlackBerry Q10


There are certain times when you may geek out more than you should with your BlackBerry 10 phone and run into some issues. Whether it be a poor-running OS leak, an interrupted security wipe or a somehow nuked device, you may want to downgrade or reload the stock OS. Thankfully, just as in the past, you can still do so on BlackBerry 10. 
With older BBOS devices there was a high chance of "nuking" a device for any number of reasons - bad apps, botched restore, bad software, crappy OS leaks ... you name it. On BlackBerry 10 there is really no chance at all that you'll ever need to reload the OS unless you run across a bad leaked OS or happen to stop a security wipe prematurely.
For both the BlackBerry Z10 and BlackBerry Q10 you can restore the OS to stock when you run into any of these issues. The process unfortunately requires a Windows PC (sorry Mac users) but requires only a few steps to complete. 
You can reload or downgrade the OS on your BlackBerry 10 device one of two ways.
The Easy Way - Reload BlackBerry 10 OS Using BlackBerry Link
  • Open BlackBerry Link and connect your device via microUSB
  • Select Settings (gear icon)
  • Select Reload under Reload Device Software
  • Follow the on-screen instructions to reload the software. When complete you can disconnect your device. 

  • Make sure you have the latest version of BlackBerry Link installed on your Windows PC. 
    After you reload the device software we recommend setting up the device as new to prevent further issues.
    The Harder Way - Reload BlackBerry 10 Using Internet Explorer
  • Make sure you don't have any BlackBerry software running on your PC (BlackBerry Link and BlackBerry Desktop Software)
  • Detach all BlackBerry smartphones, including the BlackBerry 10 device that you are going to restore.
  • Using Internet Explorer navigate to www.BlackBerry.com/updates then scroll down the page and select the Check for Updates button.
  • Connect the BlackBerry 10 device you want to restore
  • Hold the power button for 10 seconds until the device turns off, then press the power button again so it turns on.
  • A prompt will appear and the BlackBerry smartphone will show in the drop down list on your PC shortly after the LED lights up (it could show up as USB: UNKNOWN or USB: BlackBerry (PIN) – both are normal/fine).
  • Click the OK Button as soon as it becomes enabled - you only have a few seconds to do this!
  • Once the above steps are completed successfully a dialog will be displayed stating Checking for BlackBerry Device Software updates
  • Your device power itself off after two minutes. Shortly after, the device LED should turn green.
  • Continue to wait after the LED turns green and you will be prompted to install BlackBerry Device Software. Follow the prompts to install the BlackBerry Software and finish the software installation

  • If for some reason the above steps don't work using BlackBerry Link you can always reload the OS using Internet Explorer. These steps are a bit trickier so read through and make sure you understand everything before you get started. 
    Fire It Up!
    Now you should have a fresh stock OS installed on your device. If for some reason the device still won't boot, try running through either method again until you get it to restore the OS. 
    Of course if you run into further issues you can always get more help on reloading in CrackBerry's BlackBerry 10 OS forum.
    Looking to restore an older BlackBerry OS device? Check here.

    How to Bypass Lock Screen with Android Lock Screen Removal

    n Bypass Lock Screen with Android Lock Screen Removal

    bypass android lock screen hack, bypass android lock screen without google account, bypass android lock screen without reset, how to hack android pattern lock, how to unlock locked android phone without losing data, how to break pattern lock on android phones, how to hack android pattern lock without any software, how to hack a phone password android

    Bypass Lock Screen with Android Lock Screen Removal

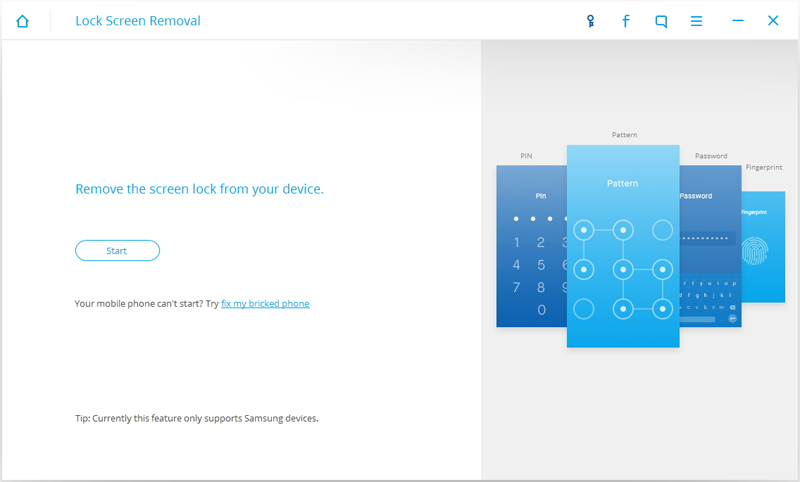
    No matter you forgot the password on your Android lock screen or just get a second-hand device and don’t know the lock screen’s passcode, this Android Lock Screen Removal enables you to get rid of the unknown passcode in 5 minutes, including pattern, PIN, password and fingerprint. Whatever the passcode you choose, you won’t lose any data on your device by removing it with this Android Lock Screen Removal.
    Android lock screen removal

    How to use Bypass Lock Screen with Android Lock Screen Removal

    Developer: Wondershare
    Android Lock Screen Removal

    dr.fone toolkit – Android Lock Screen Removal

    Remove 4 Types of Android Screen Lock without Data Loss
    Features:
    a. It can remove 4 screen lock types – pattern, PIN, password & fingerprints.
    b. No tech knowledge asked, everybody can handle it.
    c. Work for Samsung Galaxy S/Note/Tab series, and LG G2, G3, G4, etc.
    Available on: Windows
    Try Now Buy Now
    Android Lock Screen Removal7 Day Money Back Guarantee
    You can follow the simple steps below to bypass Samsung lock screen pattern, PIN, password and fingerprint.
    Before all the steps, you are supposed to download dr.fone first.
    Link: https://drfone.wondershare.com/android-lock-screen-removal.html
    Price: Free Trial Version
    around $3.3 per month for offical version
    Pros:
    a. 100% Security Guarantee. Only remove the lock screen, no data loss at all.
    b. It provides free lifetime update.
    c. It offers 7 day money back guarantee service.
    Cons:
    The tool works for Samsung and LG devices only.
    SOURCE: wikisir.com

    HOW TO SOLVE BB Z10 RED LIGHT BLINKING...100% working

    First and fore most, watch this video: https://www.youtube.com/watch?v=zeqraPfZM6A
    Use this working auto loader
    Click here 
    here is the link

    STL100-1download

    STL100-2/3 download

    must install black berry link 

    blackberry link here DOWNLOAD

    Sunday, September 10, 2017

    How to bypass frp (Google account lock) on ZTE Z812


    Here is just another tutorial on how to bypass Factory Reset Protection (Google Account Lock) on ZTE Z812.
    This method is no only for this phone it can also be used on other devices.

    Note
    This tutorial assumes that your are the owner of the phone I'm not responsible for how this tutorial is used
    Use at your own peril........ Connect to any working WiFi connection. Select any typing space, the press and hold @ button on keyboard. Touch the small setting icon that appear. Select Google Keyboard Settings > Text correction> Personal Dictionary > For all languages Now click the plus (+) icon then add a new word. When you have added the word, click the search icon. On the search bar, type in lang then select Language from the search result. Now under language & input page, scroll down and select Text-to-Speech output. Select the settings icon near Google Text-to-speech. Select install voice data. Under Google TTS voice data, touch the 3 dot icon and select open source licenses. Press and hold any word on the license page then press search button. Use Google App for the search. Type in file on the search bar and then select file manager. Now navigate to SDcard and install frp bypass apk. Launch frp bypass You will now see a Re-type password page Tap the 3 dots at top right and select Browser Sign-in Tap OK and sign in your Account. Reboot device and setup as usual. The following screenshots below shows how to do this with ease.

    how to run whatsapp on your pc/laptops

    How do I use WhatsApp Web?

    Image result for how to run whatsapp on pc
    To provide you with a richer communication experience, WhatsApp is now accessible both on your phone and your computer. WhatsApp Web is a computer based extension of the WhatsApp account on your phone. The messages you send and receive are fully synced between your phone and your computer, and you can see all messages on both devices. Any action you take on the phone will apply to WhatsApp Web and vice versa. At this time, WhatsApp Web is available only for Android, iPhone 8.1+, Windows Phone 8.0 and 8.1, Nokia S60, Nokia S40 EVO, BlackBerry and BlackBerry 10 smartphones.
    WhatsApp Web is not another WhatsApp account. When you use WhatsApp on your computer and your phone, you are simply accessing the same account on these two devices.
    Minimum requirements to enjoy WhatsApp Web
    • You need to have an active WhatsApp account on your phone.
    • You need to have a stable internet connection on both your phone and your computer.
    • You need to use the latest version of Chrome, Firefox, Opera, Safari or Edge as your web browser on your computer.
    To get started with WhatsApp Web
    1. Visit web.whatsapp.com on your computer.
    2. Open WhatsApp on your phone. 
      • On Android: in the Chats screen > Menu > WhatsApp Web.
      • On Nokia S60 and Windows Phone: go to Menu > WhatsApp Web.
      • On iPhone: go to Settings > WhatsApp Web.
      • On BlackBerry: go to Chats > Menu > WhatsApp Web.
      • On BlackBerry 10: Swipe down from top of the screen > WhatsApp Web.
      • On Nokia S40: Swipe up from bottom of screen > WhatsApp Web.
    3. Scan the QR Code on your computer screen from your phone.
    From your phone, navigate to WhatsApp Web to view your logged in computers or to logout from an active WhatsApp Web session.
    Note: To avoid data usage charges on your phone, we recommend that you are always connected to Wi-Fi when using WhatsApp Web.

    To install on Windows 8+ 

    1. On your computer’s browser, navigate to the download page to download the .exe file.
    2. Once the download is complete, open WhatsApp.exe to install WhatsApp on your computer.
    3. When the install is complete, launch WhatsApp on your computer and scan the QR code to log in.

    To install on Mac OSX 10.9+

    1. On your computer’s browser, navigate to the download page to download the .zip file.
    2. Once the download is complete, open the zip file to run WhatsApp.app.
    3. On your first install, the application will prompt if you would like to add WhatsApp to your Applications folder and your desktop dock.
    4. When the install is complete, launch WhatsApp on your computer and scan the QR code to log in.
    Alternatively, you may download and install it via Apple App Store
    To scan the QR code
    • On Android: Chats screen > Menu > WhatsApp Web.
    • On iPhone 8.1+: Settings > WhatsApp Web.
    • On Windows Phone 8.0+: Chats screen > Menu > WhatsApp Web.
    Note: ARM processors and Linux based systems are not supported.